
This guide will equip you with crucial strategies for locating safe drinking water while bikepacking in remote areas. Being properly prepared can mean the difference between an enjoyable adventure and a dangerous situation. You’ll learn how to identify potential water sources, recognise signs of water and use reliable filtration methods to ensure your hydration needs are met. With the right knowledge, you can confidently tackle the wilderness and keep your journey on track.
Navigating the Terrain: Identifying Potential Water Sources
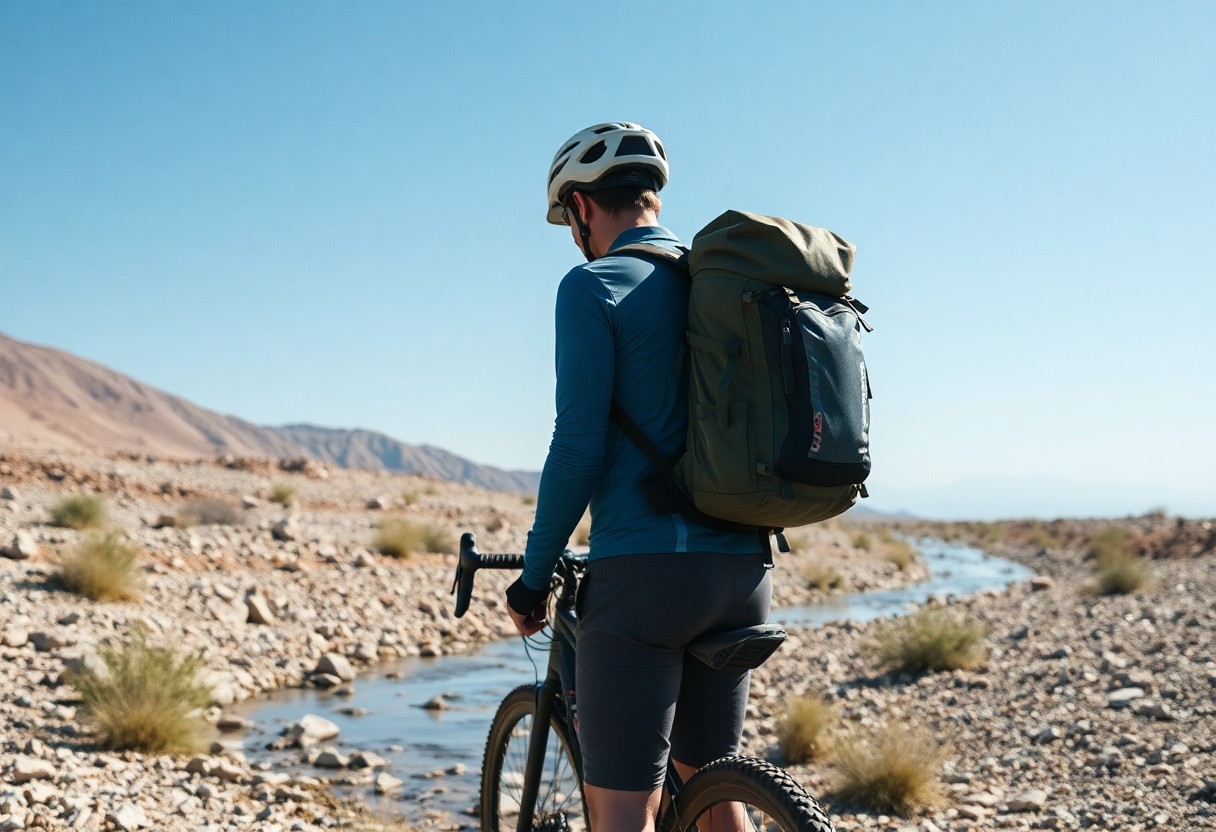
Understanding the landscape around you plays a key role in identifying potential water sources while bikepacking. Look for signs of moisture like lush vegetation or animal tracks, as they often indicate the presence of water nearby. River valleys and low-lying areas usually collect runoff, and that’s where you’ll often find streams or ponds. Additionally, local geology can provide insights; areas with soft sedimentary rocks are typically more water-rich compared to harder, less permeable formations.
Recognising Natural Indicators
Natural indicators can guide you towards water. Insects such as dragonflies often indicate proximity to water, while birds, especially those like herons and ducks, signal water bodies nearby. Muddy patches in a trail or footprints of animals can also point you toward watering holes. If you spot greenery amid arid surroundings, it’s a positive sign that there’s moisture underground.
Mapping Water Resources in Remote Areas
Utilising mapping tools and resources enhances your ability to locate water sources effectively. Topographical maps can reveal rivers, lakes, and streams, while GPS apps often provide real-time data on water availability. Additionally, platforms like AllTrails or Komoot may list nearby water bodies and user reviews about water quality, making it easier for you to plan your route with hydration in mind.
Integrating this information can significantly improve your chances of finding reliable water sources. Familiarising yourself with local maps prior to your trip allows for advanced planning. Mark specific locations noted for their water availability and share this knowledge with fellow riders. As you ride, actively check for the visual cues on your map and in your environment, and always have a backup plan in case your primary source is dry.
Techniques for Water Extraction: Making the Most of Your Surroundings
In the quest for hydration, utilising the environment can be a game changer. Whether through natural precipitation or native vegetation, employing specific techniques can help you gather precious water when you need it most. Understanding the signs of available sources is key, as spotting opportunities can make all the difference in remote areas. Exploring various extraction methods ensures you remain well-hydrated throughout your bikepacking adventure.
Collecting Rainwater and Dew
Gathering rainwater and dew is one of the simplest techniques available. Setting up a tarp or a container during rain showers can yield significant amounts of water, while dew can be collected by wiping leaves with a cloth in the early morning. This method is particularly effective in climates where moisture condenses easily, providing a refreshing source of hydration without needing intricate equipment.
Utilizing Plants as Water Sources
Certain plants can be excellent indicators of water availability or can even serve as direct sources themselves. For instance, the cactus and the aloe vera plant store water in their cells, making them valuable assets during dry spells. Similarly, the moisture from roots of plants like grasses or from larger trees can be accessed by digging slightly around their base. It’s necessary to learn about local flora before your trip, as some plants contain bitter or toxic substances that may require filtration or may not be suitable for ingestion.
Finding water sources by utilising flora can also vary by region. Many plants, such as the willow tree or coconut palm, not only signal potential hydration but also provide edible parts. Adjust your extraction methods according to the plant characteristics—succulents store moisture in their fleshy leaves, while grasses may require a more thorough approach, such as squeezing sap from their stems for liquid. Being plant-savvy allows you to maximise your hydration strategy, making your bikepacking journey more sustainable and enjoyable.
Water Purification Methods: Ensuring Safe Consumption
Ensuring the water you collect is safe for consumption is important for a successful bikepacking trip. Various purification methods can eliminate harmful contaminants and pathogens. Choosing the right method depends on accessibility, the type of water source, and your personal preferences. Typical strategies range from chemical treatments to advanced filtration systems, with each offering its unique advantages and drawbacks. Being informed about these options helps you to make the best choice for your hydration needs while traversing remote terrains.
Tried and Tested Filtration Techniques
Using a portable water filter is one of the most reliable methods for purifying water while bikepacking. Popular filters, such as those by Sawyer or Katadyn, can effectively remove bacteria, protozoa, and even some viruses, offering peace of mind with each sip. Most filters are lightweight and easy to use, enabling you to fill your hydration pack or bottle from various water sources. Consider filters with a hollow fibre design for quicker flow rates and a longer lifespan, ensuring you have ample water for the journey ahead.
DIY Water Purification Solutions
DIY water purification methods are not only resourceful but can also be lifesaving in remote areas. Boiling is one of the simplest techniques; bringing water to a rolling boil for at least one minute will kill most pathogens. Alternatively, you could construct a makeshift filter using layers of sand, gravel, and charcoal, which can improve the taste and clarity of the water. These methods may require more time and effort than commercial filters, but they provide you with valuable alternatives when you’re stuck without proper gear.
For a straightforward DIY filtration system, you can assemble a water filter using readily available materials, like a clean cloth or coffee filter combined with sand and activated charcoal. Start with the cloth to catch larger debris, followed by a layer of sand to eliminate finer particles, and finally, activated charcoal to absorb chemicals and impurities. Note that while this method enhances water clarity and taste, it may not eliminate all pathogens. Always follow it up with one of the more reliable purification methods, like boiling, for safe drinking water.
Essential Tools and Gear: Preparing for Hydration Needs
To ensure you remain hydrated on your bikepacking adventure, equipping yourself with the right tools and gear is imperative. This preparation allows you to efficiently collect, purify, and store water, making your journey smoother. Have systems in place that cater to your anticipated water sources. Consider your specific route, local geology, and topography to choose the best solutions for your hydration needs.
Must-Have Water Collection Equipment
When considering collecting water, having the right equipment can significantly ease your tasks. A reliable foldable water container offers convenience for transport, while a compact water filter allows for swift purification on the go. Consider also packing a collapsible bucket for gathering from larger water sources. Each piece of gear adds efficiency to your water collection efforts, ensuring you never find yourself parched in the wild.
Choosing the Right Water Treatment Systems
Selecting the most suitable water treatment system depends on various factors, including your specific needs, the environments you’ll encounter, and how much weight you’re willing to carry. Options range from simple filtration systems to more complex UV purifiers. A portable filter, for example, can remove sediments and bacteria, while a UV purifier offers instant treatment ideal for clear water sources, ensuring you can enjoy fresh, clean water without added bulk.
Many bikers prefer pump filters for their versatility in various environments, while others opt for gravity filters to treat larger quantities at once. The weight and battery life are paramount considerations for your choice as well. While larger systems might weigh more, the convenience of treating and storing multiple litres of safe water can be worth the extra load. Conducting thorough research and testing different options before your trip can yield the perfect match for your bikepacking expedition.
Tactical Planning: Strategising Water Intake on Your Route
Optimal water intake during your ride hinges on meticulous tactical planning. You must assess your route carefully, identifying sections that may lack reliable water sources, allowing you to ration your water effectively and maintain hydration. Consider factors such as temperature, elevation, and distance between water access points, and always have a backup strategy in case of unexpected dryness.
Creating a Water Availability Checklist
Constructing a water availability checklist is an advantageous step in your planning process. This list should detail potential water sources along your chosen route, including rivers, lakes, or springs, while also noting their expected reliability based on previous scouting or local information. By marking these locations, you can avoid uncertainty and approach each segment of your journey with confidence.
Adapting Your Journey Based on Water Supply
Your route may require adjustments based on the reliability of water sources you encounter. If a previously identified water spot is dry, you’ll need to recalibrate your distances and find alternate access points, perhaps modifying your daily mileage. Staying flexible is key; should you find a stream that was not on your checklist, take advantage and refill to ensure your hydration needs remain met.
Be prepared for these changes by frequently checking your water supply and evaluating alternatives. For instance, if a sunny day rapidly depletes your reserves, considering a lighter riding pace could allow you to extend your reach to the next known water point. Mapping out contingencies, such as extra hydration methods or alternative routes, can mean the difference between a flourishing adventure and an arduous struggle.
Conclusion
The ability to find water while bikepacking in remote areas is necessary for your safety and enjoyment. You should always plan your route by researching potential water sources in advance, using maps and local advice. Carrying a reliable water filter or purification tablets will ensure that you can safely drink from natural sources. Staying alert to signs of nearby water, like vegetation or animal tracks, can be very helpful. By preparing properly and being resourceful, you will enhance your bikepacking experience and stay hydrated through your journey.